comment 0

Blood Orange Rosemary Shrub

I’ve been working on this post for longer than I’d like to admit.  It all began with a lovely book I received for Christmas called Quench: Handcrafted Beverages to Satisfy Every Occasion.  The photos are gorgeous and it has everything from shrubs to eggnog.  I followed the Blood Orange Shrub recipe to the letter and enjoyed the tangy flavor it added to sparkling water.

However, my boyfriend likened it to drinking the liquid used to dye Easter eggs, so I decided to tweak the recipe a bit.  Using rosemary simple syrup in place of sugar adds another flavor profile and sweetens it up a bit to balance the vinegar.  I like this version better, though I haven’t persuaded him.  More for me!  My favorite way to drink this shrub is to pour a glug of it in a tall glass with a bit of ice and a lot of sparkling water.  You may also use it for an alcoholic beverage by shaking 1 shot gin and 1 shot shrub over ice; strain into a cocktail glass and top with sparkling water.

IMG_1345

IMG_1370

Rosemary Simple Syrup

1 cup sugar
1 cup water
3 sprigs rosemary, mine were 3-4 inches long

Place ingredients in a small saucepan.  Bring to a boil.  Turn down and simmer until the liquid has reduced in half, yielding a cup of syrup.

Blood Orange Rosemary Shrub

1 cup fresh squeezed blood orange juice
3/4 cup apple cider vinegar
1 cup rosemary simple syrup

Combine ingredients in a large jar or other beverage container.  Give it a shake.  Add 1-2 tablespoons of shrub to flat or bubbly water.  Store in the refrigerator for up to 6 months, though I don’t think it’ll take you that long to drink it down!
comment 0

Citrus Avocado Salad

I spent a week in Arizona around the New Year holiday with a dear old friend who moved there a couple years ago.  If you’re going to live in Seattle, it’s fortunate to have friends in sunny places.  I’m blessed with friends in Arizona, California and Hawaii.  The sun is always just a friend away.

There are lots of great reasons to visit Arizona during the winter and my favorite is picking ripe citrus fruit right from the tree.  My friends have trees in their side yard, heavy with lemons, limes, oranges and grapefruit.  For a girl from the Northwest, I can liken this to Charlie being let loose in the Chocolate Factory.  No matter how many we picked, the stash appeared unchanged.  The concept of actually picking and eating all the fruit was impossible.  Neighbors leave bags full of citrus by the mailboxes in hopes they’ll find good homes.  It reminded me of what can happen with heaping zucchini harvests during the summer here in Seattle.

So, we had bowls of fruit at breakfast, Greyhounds and Moscow Mules for happy hour and this wonderful salad with dinner.  Arriving home, I promptly purchased the ingredients and made it again.  It tasted like a ray of sunshine on a grey January day, but it didn’t taste as good as when we picked the fruit ourselves.  How could it?  Make it anyway and dream of the blue skies citrus grows under.

Citrus Avocado Salad

To segment the citrus fruit, I cut away the peel and pith with a serrated knife.  Then I remove each segment by cutting as close to the membrane as possible.  What’s left is a juicy citrus skeleton of sorts.  There’s a nice tutorial here.

4 leaves butter lettuce, washed and dried
1/2 of a large orange, segmented
1/2 of a similar-sized pink grapefruit, segmented
1/4 of an avocado, sliced
1 green onion, green end only, sliced
1 teaspoon extra virgin olive oil
A few grinds of sea salt and pepper

Stack the lettuce leaves and arrange the citrus segments and avocado on top.  Drizzle with oil. Salt and pepper to taste.  Garnish with green onion.

comment 0

Green Tomato Salsa

“Inside every cynical person, there is a disappointed idealist.” ~ George Carlin

When thinking of the future, it’s natural to look to the past to predict what’s to come.  Surely, that’s a purpose of our lifelong experiences.  After being burned, we learn to stay away from the fire.  Unfortunately, this logic doesn’t leave much room for hope and possibility.

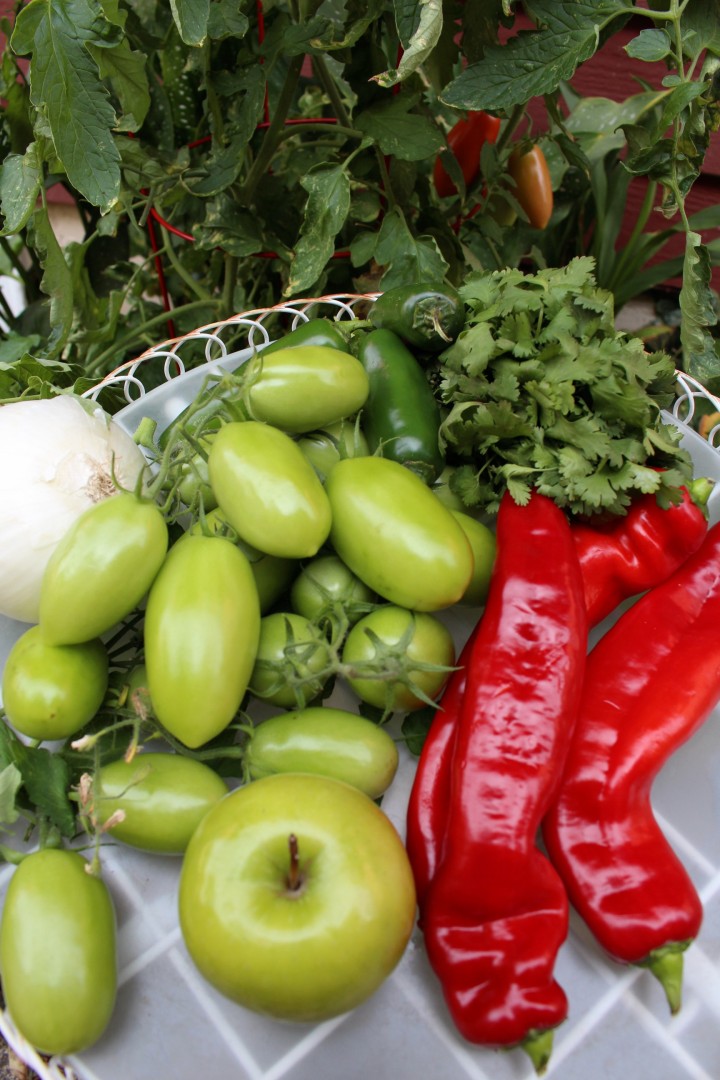
There are Seattle gardeners who grow large red tomatoes every year.  I am not one of them.  My cherry tomatoes ripen, but all the other varieties I’ve planted thrive into beautiful plants, heavy with green fruit.  It doesn’t stop me from trying.  I tell myself my garden doesn’t get enough sun (not now, nor in the half dozen other places I’ve lived).

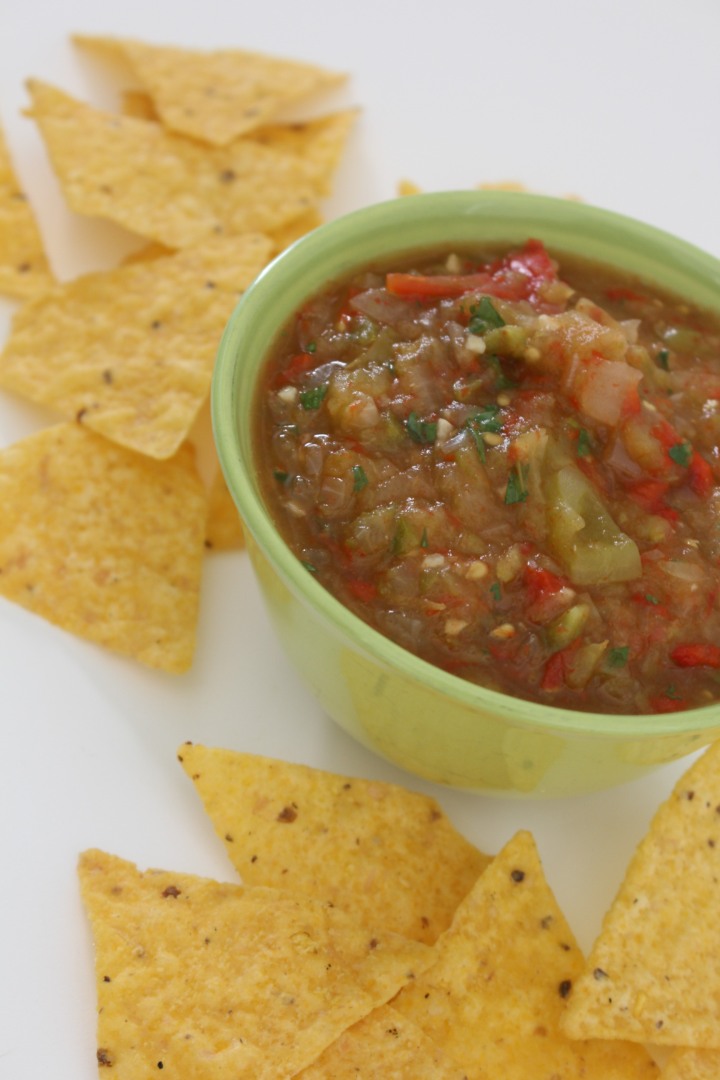
Thus, I decided to make green tomato salsa again this year, well before the ripening season had ended.  I have green tomatoes now, why wait for the red ones that may never come?  This perspective may be considered negative or cynical, yet there’s something positive here too.  I’m taking what I have now and making it great.  And what do you know?  Some of my romas are turning red after all.

IMG_1198_1

IMG_1220

Green Tomato Salsa

This recipe is slightly adapted from Farmgirl Susan’s No Sugar Green Tomato Relish, at the Farmgirl Fare blog and also featured on Epicurious with a 4 Forks rating.

2 lb. green tomatoes, cored and chopped
1 lb. white or yellow onions, chopped
3/4 lb. sweet red peppers, cored and chopped
1/2 lb. tart cooking apples, such as Granny Smith, cored and chopped
6 garlic cloves, finely chopped
1/2 cup apple cider vinegar
1 Tablespoon kosher or sea salt
3 large jalapeno peppers, cored, seeded, and finely chopped
1/4 cup chopped cilantro
1 teaspoon ground cumin

Combine the tomatoes, onions, peppers, apples, garlic, vinegar, and salt in a large, nonreactive saucepan and bring to a boil. Reduce the heat and simmer, stirring occasionally, until thickened, about an hour.

Stir in the jalapenos and cumin and simmer for 5 more minutes. Add the cilantro. Carefully purée the mixture until still somewhat chunky.  Keeps in the refrigerator for 3 weeks.

Makes 3 pints.

comment 0

Italian Plum Clafouti

We’ve had quite a weather change in the last week.  Fall is becoming undeniable.  As I type, my dog is cowering from the pouring rain, thunder and lightning.  I don’t want to see the summer weather end, but fall is always an exciting time for me.  My birthday is in the fall, school begins, it truly feels like a new cycle.  I’m interested in beginning projects or recommiting to the things that fell by the wayside during summer.  I don’t get the same feeling on January 1st.  Nothing dramatic seems to shift between December 31st and the new year.  Right now though, that brisk air, blowing down the leaves, brings with it possibility.

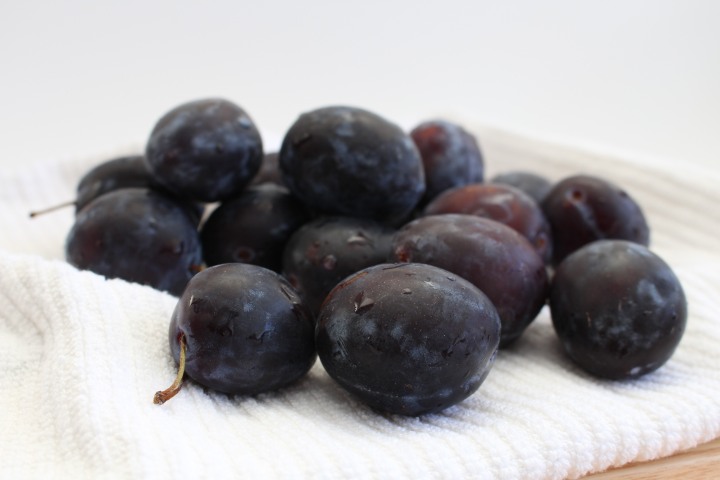
Another thing I love about the fall is the abundance of produce.  People are literally giving it away, which is how I came across these plums which grow all over the place in Seattle.  Honestly, I hadn’t given them much attention before.  I’m so glad I did this year because they are sweet and the skins aren’t too thick or tangy, something I don’t enjoy about other plum varieties. I’ve been making this clafouti recipe from Eating Well magazine for years,  though this is the first time I’ve used the Amaretto it calls for.  It adds so much flavor, I won’t go back to omitting it.  In addition, I plan to revisit my 20s by making Amaretto sours with the leftovers.

IMG_1163

IMG_1172

Italian Plum Clafouti

1 pound fresh Italian plums, cut in half and pitted
1/4 cup almond liqueur, such as Amaretto
2 teaspoons lemon zest
2 teaspoons lemon juice
1 pat butter
1 tablespoon plus 1/3 cup sugar, divided
3 large eggs
1 cup milk (I used unsweetened soy)
2/3 cup unbleached all-purpose flour
1/2 teaspoon almond extract
Pinch of salt
1/4 cup sliced almonds
Powdered sugar for dusting

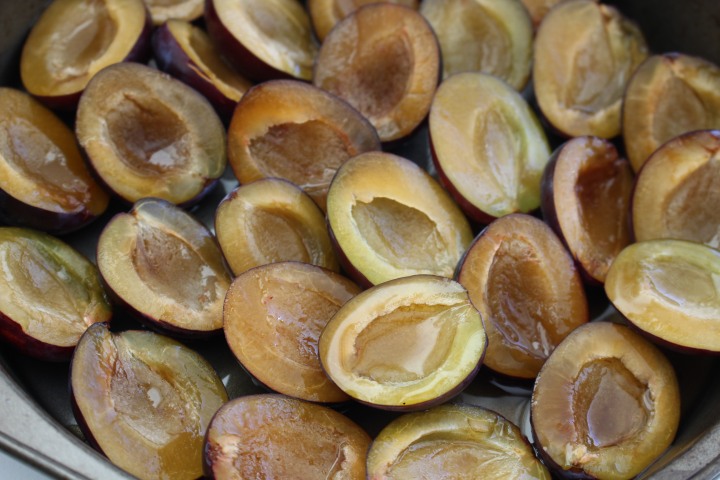
Combine plums, lemon juice and almond liqueur in a large bowl.  Let stand 1 hour.

Preheat oven to 350 degrees F.  Grease a 10-inch round baking dish with butter.  Sprinkle 1 tablespoon of sugar evenly over the bottom.  Drain the plums, reserving the syrup.  Arrange plums cut side down in the baking dish.

Use a whisk or handheld mixer to combine the eggs and 1/3 cup sugar until pale yellow.  Add milk, flour, almond extract, salt, lemon zest, and the reserved syrup; beat well.  Pour the batter over the plums, sprinkle with almonds and bake until puffed and golden, about 45 minutes.  Let sit for 20 minutes, then dust with powdered sugar and serve warm or at room temperature.


comment 0

Indonesian Red Rice Stir Fry

I’ve been accused of taking my own sweet time.  Some years ago, as I lagged behind, I was reprimanded for it, being told in an exasperated voice, “you have no sense of urgency!”  It certainly wasn’t meant as a compliment and I had a hard time believing it could be true since being non-urgent sounded pretty terrible.

When I think back to that experience, it makes me laugh, because it is true!  Relatively speaking, I have little sense of urgency.  And it’s absolutely nothing to be ashamed of.  In this world of busy people with booked schedules and harried lives, it may even be a revolutionary act.

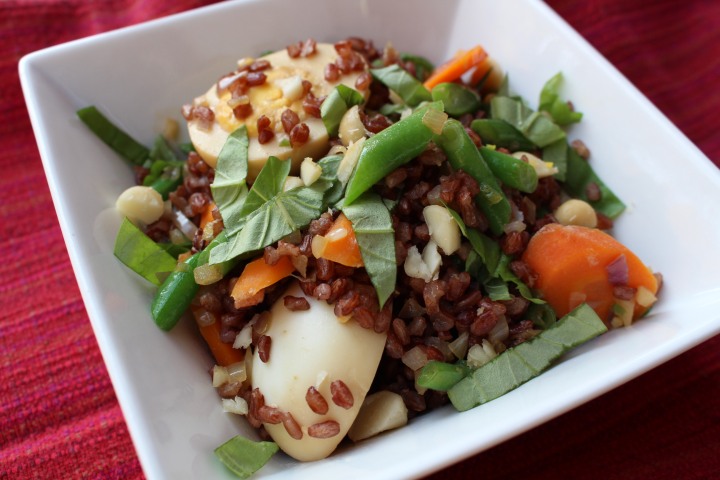
Stir fry recipes like this red rice dish are relaxing for me as everything may be prepped ahead of time, at my leisure.  Pour a glass of wine, turn up the music and chop.  Order all your ingredients by the stove and calmly, expertly, add them one by one until you have this delicious meal.  The recipe is adapted from The New Whole Grains Cookbook by Robin Asbell.

IMG_0985

Indonesian Red Rice Stir Fry

1 cup red rice
1 tablespoon coconut oil
4 large shallots, minced
3 cloves garlic, minced
1 serrano chile, seeded and minced
1-inch piece ginger root, peeled and minced
1 teaspoon ground coriander
1 large carrot, thinly sliced
8 ounces green beans, trimmed and chopped
1/2 cup coconut milk
1/4 cup tamari or soy sauce
1/2 teaspoon molasses
4 large eggs, boiled and peeled
1 large lime quartered
1/2 cup julienned fresh basil
1/4 cup chopped macadamia nuts

Fill a 4 quart saucepan 3/4 of the way with water and a pinch of salt.  Put on the stove to boil.  Once the water is boiling, add the red rice and turn down to a controlled boil, medium high should do it.  Cook until the rice is tender to taste.  Drain the water and set aside.  I cook, peel and halve my eggs while the rice is boiling.

In a wok or large saute pan, heat oil over medium-high.  Add the shallots, garlic, chile, ginger, coriander, carrot and green beans.  Stir fry until the vegetables are brightly colored and crisp-tender.

Add the coconut milk, tamari and molasses to the wok and bring to a boil.  Push the vegetables over to one side to make room for the eggs.  Place eggs in the boiling sauce, cut sides down.  Simmer for 2 minutes.  Add cooked rice to the pan and combine the ingredients gently, until everything is heated through.  Garnish with lime wedge, basil and macadamia nuts.


comment 0

Summer Gratin with Basil Pesto

I did a definition search for the word decadent and was surprised to see that the least damning definition could still use some explaining.

Decadent
noun: 1. a person who is luxuriously self-indulgent

It’s actually a good fit, once I tell you that time is the greatest luxury.  Time can’t be bought or sold.  When time runs short, we can’t print off more like the central bank.  I’ll also admit to being self-indulgent with my time.  As we are so often reminded, there are only 24 hours in a day, and to spend a good portion of it strolling through the farmer’s market, cooking, eating and washing dishes feels luxurious to me.  Well, maybe not the washing dishes part.

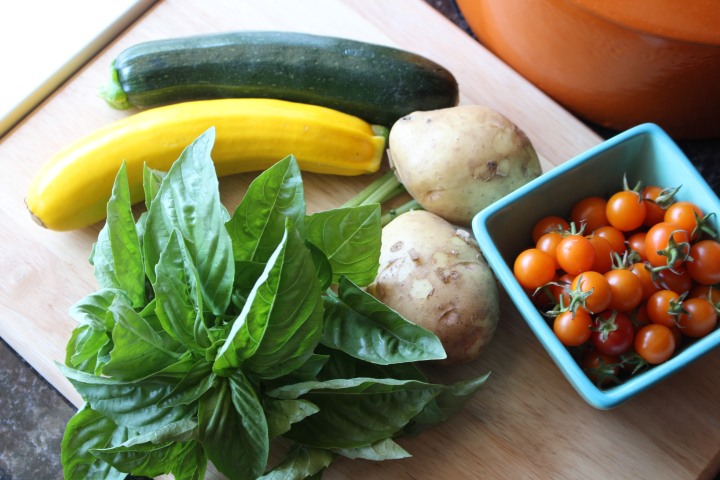
The pesto recipe I used is from Feeding the Young Athlete by Cynthia Lair.  It’s a flavorful basic recipe that comes together quickly.  I went a bit overboard with the pesto, practically finger painting it on all the ingredients.  I suggest you learn from my delicious, yet heavy, mistake by setting half of it aside prior to assembling the gratin.  Use leftover pesto with pasta, sandwiches, potatoes, eggs, meat, etc.

IMG_0960

IMG_0965

Breadcrumbs

3 ounces stale artisan bread
1 tablespoon butter

Warm a sauté pan to medium low heat.  Slice bread into 2 inch cubes.  Pulse in food processor until desired consistency, I like mine a little chunky.  Melt butter in sauté pan and then add bread crumbs.  Stir until fragrant and golden.  Set aside.

Basil Pesto

2 cups tightly packed basil leaves (about 2 ounces)
1/2 cup extra-virgin olive oil
2 tablespoons pine nuts or walnuts
2 cloves garlic
1/2 teaspoon salt
1/2 cup freshly grated parmesan cheese

Before measuring, remove stems from basil leaves.  Rinse and spin dry the basil.  Blend first five ingredients together in a blender or food processor until smooth.  Place in a bowl and stir the parmesan into the basil mixture.

Summer Gratin

1/2 recipe basil pesto
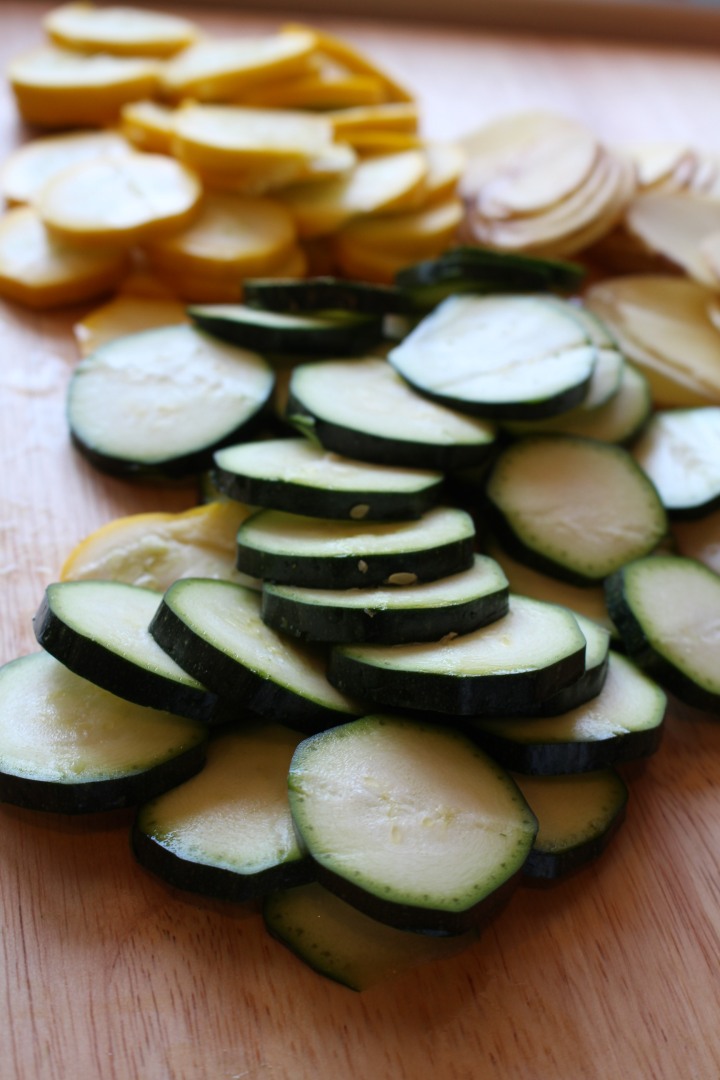
2 medium potatoes, sliced paper thin (I used a mandolin)
1 medium zucchini, sliced 1/8th of an inch wide
1 medium summer squash, sliced 1/8th of an inch wide
1 pinch small cherry tomatoes
3 ounces bread crumbs

Preheat oven to 350 degrees. Grease 9″ baking dish with pesto.  Line the bottom of the dish with alternating slices of zucchini, potatoes and summer squash; using half of these ingredients.  Top this layer with all your cherry tomatoes and drizzle with pesto.  Add one more layer of squash and potatoes.  Drizzle on more pesto.  Now add the breadcrumbs and bake for 40 minutes.

Makes 4 entrée sized portions.


comment 0

Honey Dijon Chicken Salad

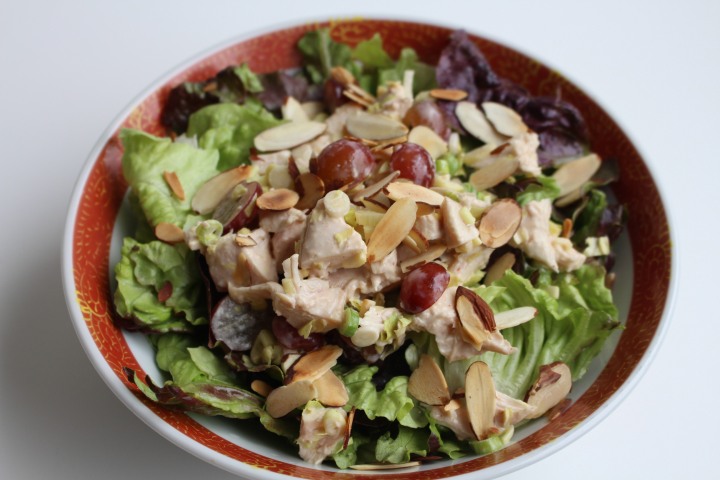
Purchasing a rotisserie chicken is a good way to limit your time in the kitchen on warm summer evenings.  I’m a dark meat kinda gal and the legs go quick.  I like to use the drier meat around the breastbone in soups and salads.   I served this chicken salad on red leaf lettuce, though it would work in a sandwich or wrap as well.

Honey Dijon Chicken Salad

1 tablespoon mayonnaise
1 teaspoon honey
1 teaspoon dijon mustard
1 teaspoon apple cider vinegar
1 small clove garlic, pressed
1 pinch salt and pepper
1 pinch smoked paprika
1 1/2 cups chopped cooked chicken breast
1 cup red grapes, halved
1/2 cup chopped celery
1 green onion, sliced
handful slivered almonds, toasted

Make dressing by whisking together mayo, honey, mustard, vinegar, garlic, salt, pepper and paprika.  Set aside.  Use a small mixing bowl to combine chicken, grapes, celery and green onion.  Drizzle dressing over the salad ingredients and mix well.  Top with almonds.

Makes 2 servings.


comment 0

Avocado Omelette with Fresh Salsa

I’ve learned a thing or two about cooking eggs from my friend Andy.  We’ve even named his signature preparation A’s Eggs.  He makes them with a little cheese and chopped tomato.  One of the things that makes his eggs so good is the nurturing aspect of food.  Doesn’t food taste that much better when friends or family make it for you?  Starting my day with a dish thoughtfully prepared by someone feels wonderful.  In his absence, I cook eggs for myself, so I know I’m loved.

Forgive my unauthentic salsa recipe.  I used what I had on hand and was happy with the result because it tasted great and added a lot of color.  Colorful plates are high in nutrition and fun to photograph.

Fresh Salsa

2 cups mini heirloom tomatoes, quartered
1/4 red onion, chopped
juice of 1 small lime
1/4 bunch cilantro, stems removed and minced
1/4 teaspoon salt

In a medium bowl, mix ingredients gently and set aside.

Avocado Omelette

2 eggs
1 teaspoon water
salt and pepper
pat of butter
1 handful grated cheddar cheese
1/4 avocado, sliced

Use a saute pan the size of a small dinner plate.  Heat to medium-low.  Whisk eggs with water and a pinch of salt and pepper.  A bit of liquid like water or milk helps the eggs cook evenly. Coat the pan with a pat of butter and pour in the eggs.  Sprinkle the cheese on one half of the eggs and add the sliced avocado.  Once the underside of the eggs look cooked, use a large spatula to flip the side without cheese and avocado over those ingredients.  Add a lid and turn heat to low.  Cook until the eggs are set, a few more minutes.  Slide omelette onto a plate and top with a generous amount of fresh salsa.

Serves 1 hungry person. Consider a 1 egg omelette if desired, just use a small saute pan to cook.


comment 0

Fresh Herb Korean Tacos

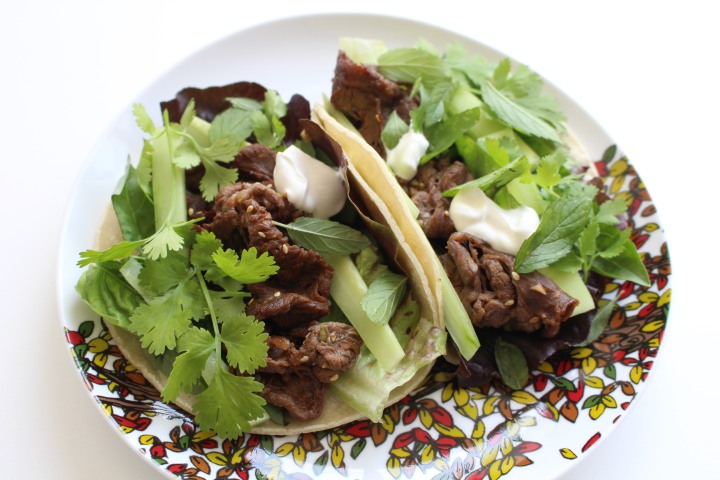
This dish is a mash-up of Korean Bulgogi Beef with vegetables and herbs often found in Vietnamese cuisine, and served Mexican-American style in corn tortillas with a dollop of sour cream.  I’ve adapted mine from a post by Tina Jeffers on the Bliss blog.  Tina has her own blog as well, called Scaling Back.  Her recipes are healthy and delightfully unexpected, although I’m a follower for her gorgeous photography.  I’ve “pinned” many of her recipes, but I think this is the only one I’ve actually made.  With all the fresh ingredients and the brief cooking time, it’s one of my summer favorites.

For these tacos, I use very thinly sliced beef found at Central Market.  This time the package was labelled Beef Chuck for Sukiyaki.  The butcher assured me it would work, despite the name.  I don’t have a lot background related to purchasing and cooking meat, so I depend on the expertise of those working the counter wherever I shop.  I’ve always found them very helpful, so don’t hesitate to ask!  Also, did you know that they’ll sharpen your knife at the meat counter?  Bring one knife at a time and ask during a not so busy time to make it a pleasant experience.

Fresh Herb Korean Tacos

1/2 pound thinly sliced beef
1/4 cup tamari or soy sauce
1 teaspoon toasted sesame oil
1 teaspoon Sriracha sauce
1 teaspoon grated ginger
1 clove garlic, minced
1/4 cup water
1 teaspoon toasted sesame seeds
1 green onion sliced
6 corn tortillas

Taco Toppings

1 small cucumber
leaf lettuce
fresh cilantro, basil and mint
sour cream

Make the marinade in a shallow dish large enough for the beef.  I used a glass pie dish; a square casserole is another good option.  Use a whisk to combine the tamari, sesame oil, Sriracha, ginger, garlic and water.  Add the beef and top with sesame seeds and green onion.  Turn the meat gently to coat it well.  Cover and place in the refrigerator for 1 to 24 hours to marinate.

Before cooking the meat, get your toppings prepped so the tacos may be assembled while the meat is hot.  Broil or grill the meat briefly, about 2 minutes per side.  Layer lettuce, beef, cucumber and fresh herbs on heated corn tortillas.  Dollop with sour cream.  Makes 6 tacos.


comment 0

Sweet Basmati Rice with Carrots and Almonds

This is the rice I made with the Persian Turmeric Chicken.  I adapted the recipe from the same cookbook, The New Persian Kitchen.  I’m still loving the book, in fact I’m reading it like a novel now, from cover to cover.

Sweet Basmati Rice with Carrots and Almonds

1 cup white basmati rice, soaked in cold water for 1 hour
1 1/2 cups water
Salt
1 tablespoon unrefined coconut oil
1/2 yellow onion, finely diced
1 cup grated carrots
1/2 cup slivered almonds
1/2 teaspoon ground cinnamon
1/2 teaspoon ground cardamom
1/8 teaspoon ground turmeric
Zest from one small orange
1 tablespoon honey

Drain and rinse the rice.  In a medium saucepan, combine the rice, water and a pinch of salt.  Bring to a boil and then turn down to a gentle simmer.  Cover and cook for 20 minutes.  The rice should be dry and fluffy.  Set aside.

While the rice is cooking, heat a skillet over medium and saute the onion in the coconut oil until soft and translucent, about 5 minutes.  Add the carrots, almonds, and spices.  Cook, stirring often, until the carrots are tender, about 5 minutes more.  Sprinkle the orange zest and drizzle the honey over the carrot mixture and saute a couple minutes longer

Add the cooked rice to the carrots and gently mix.  Season with salt to taste.